


A Vue 3 user's guide to creating complex layouts
Multiple layouts application with vue 3, vue-router and vuetify


Vue.js is a JavaScript framework for creating reactive user interfaces. It has gained a lot of popularity and for good reasons. You can easily build fast, scalable, and user-friendly applications with it. In this blog post, we'll be discussing how to use layouts to change the look of your app dynamically.
Wait, what is a layout? Isn't it a standard component too?
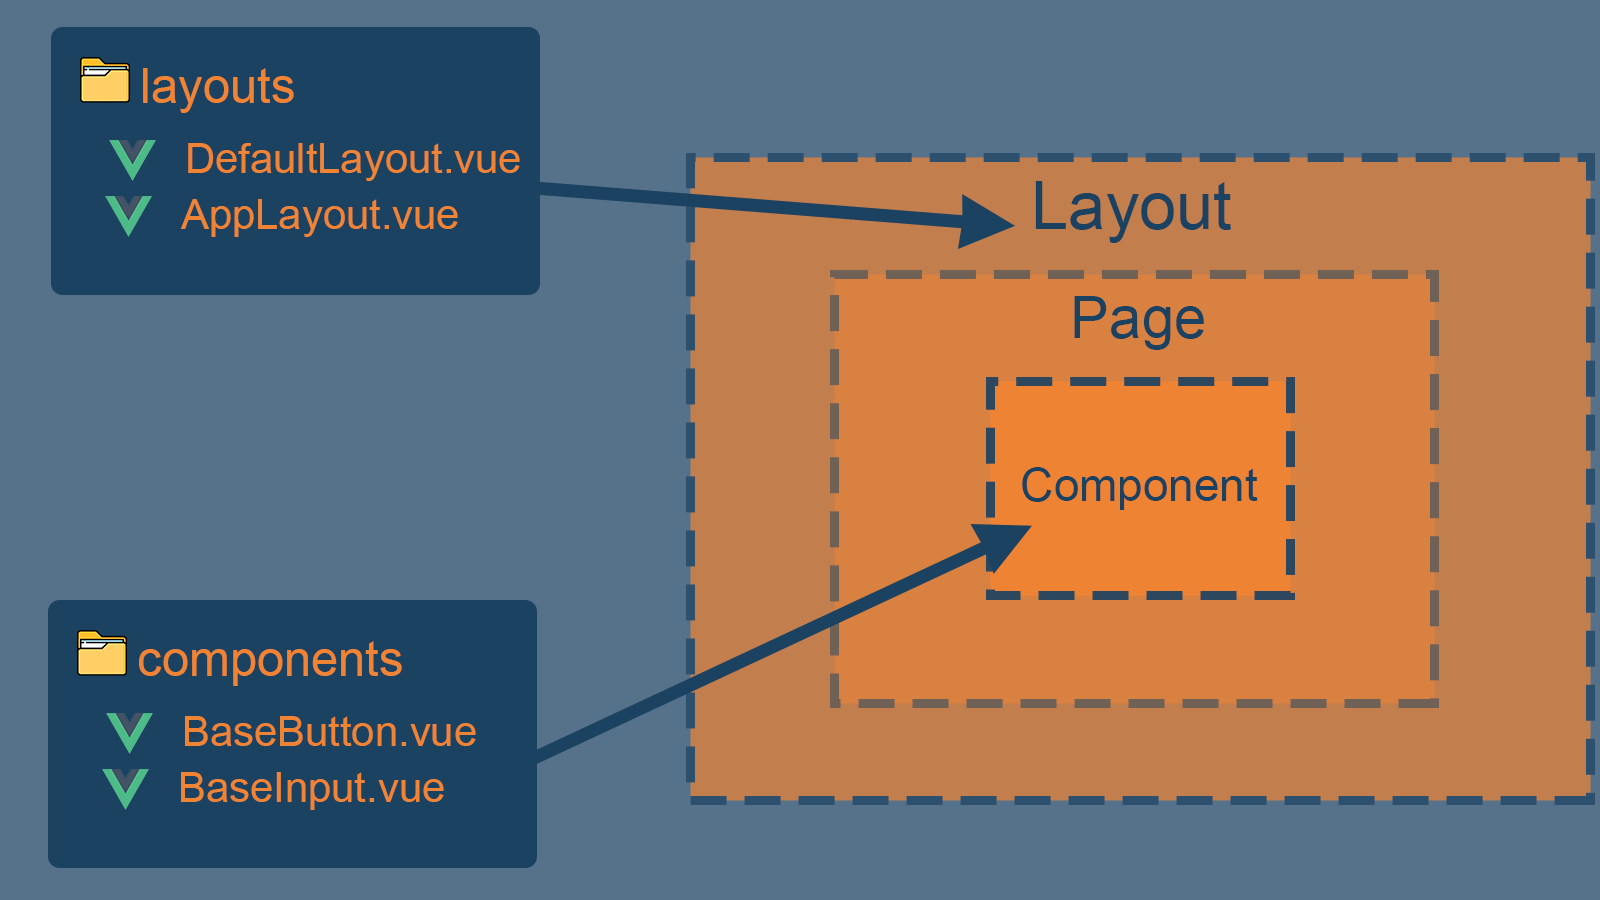
If this is the first time you have heard about layout, it may be confusing with standard components because both are the same, but there's a difference in how we use it. So layouts are also components, but it dedicated to sharing common sections overall in the app. You can think about it as a global wrapper of the app, which allows us to change the global layout of our application (e.g. adding a sidebar or navigation etc.). In contrast, components are small and reusable ui elements across the application (e.g. buttons, form elements, and cards)
Expected results
In this article, we'll try to create a basic website with different layouts. So our website consists of two various layouts:
default layout for the home page and http error pages
dashboard layout for user profile and settings
Pre-Requisites:
Please note that this article assumes the basic knowledge and understanding or familiarity with the following topics:
Vite
Vue js 3
Typescript
Vue Router 4
Project setup
- Create new vue 3 project with vite
npm init vite@latest your-project-name -- --template vue-ts
- Install and config vue router
npm install vue-router@4 --save
// or vue cli plugin
vue add router
Before we dig into the router config, please create three views (pages), so we can use them later to test the routing ( add: src -> views -> Home.vue , src -> views -> About.vue and src -> views -> Profile.vue )
// src/views/Home.vue

<template>
    <v-container class="text-center">
        <h1>Home</h1>
        <v-btn class="pa-3" to="/about">Go To About</v-btn>
        <br />
        <v-btn color="primary" class="ma-3" to="/profile">Go To Profile</v-btn>
    </v-container>
</template>

<script lang="ts" setup></script>
// src/views/About.vue

<template>
    <v-container class="text-center">
        <h1>About</h1>
        <v-btn class="pa-3" to="/">Go To Home</v-btn>
        <br />
        <v-btn color="primary" class="ma-3" to="/profile">Go To Profile</v-btn>
    </v-container>
</template>

<script lang="ts" setup></script>
// path: src/views/Profile.vue

<template>
    <v-container class="text-center">
        <h1>Hello, this my profile page</h1>

        <v-btn to="/">Go To Home</v-btn>
    </v-container>
</template>

<script lang="ts" setup>
</script>
Let's create separate config files for vue router
Create a new folder called router in the following path: src -> router
Create a new file where we can define our application routes: src -> router -> routes.ts and define some testing routes to verify that the vue router works properly
// path: src/router/routes.ts

import { RouteRecordRaw } from 'vue-router';

const routes: Array<RouteRecordRaw> = [
  {
    path: '/',
    name: 'Home',
    component: () => import(/* webpackChunkName: "home" */ '../views/Home.vue'),
  },
  {
    path: '/about',
    name: 'About',
    component: () =>
      import(/* webpackChunkName: "about" */ '../views/About.vue'),
  },
  {
    path: '/profile',
    name: 'Profile',
    component: () =>
      import(/* webpackChunkName: "profile" */ '../views/Profile.vue'),
  },
];

export default routes;
- Add the main config file for the router: src -> router -> index.ts
// path: src/router/index.ts

import { createRouter, createWebHistory } from 'vue-router';
import routes from './routes';

const router = createRouter({
  history: createWebHistory(),
  routes,
});

export default router;
- Go to your main.ts and add the following lines:
// path: src/main.ts

import { createApp } from 'vue';
import './style.css';
import App from './App.vue';

// line 1: import the router
import router from './router';

const app = createApp(App);

// line 2: use the router
app.use(router);
app.mount('#app');
Be patient—only one last step left to see some remarkable results; go to your App.vue file and add a "RouterView" instance there.
// path: src/App.vue

<script setup lang="ts">
</script>

<template>
<!-- Add this line -->
  <router-view />
</template>
Voila, now you can navigate between your pages.
Define layouts
As mentioned earlier, we'll create two different layouts, so go ahead and create a new folder ("layouts") as the first step.
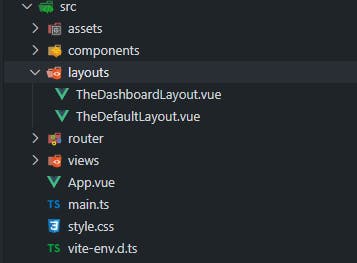
Please note that I'm using vuetify as a ui framework, but you can use your favorite one.
// Path: src\layouts\TheDefaultLayout.vue

<script lang="ts">
import { defineComponent } from "vue";

export default defineComponent({
    name: "TheDefaultLayout",
});
</script>

<template>
    <v-layout>
        <v-main>
          <!--The <slot> element is a slot outlet that indicates
                where the "VIEW" content should be rendered.-->
            <slot></slot>
        </v-main>
    </v-layout>
</template>
// Path: src\layouts\TheDashboardLayout.vue

<script lang="ts">
import { defineComponent } from "vue";

export default defineComponent({
    name: "TheDashboardLayout",
});
</script>

<template>
    <v-layout>
        <v-app-bar color="grey-lighten-2"></v-app-bar>
        <v-navigation-drawer color="grey-darken-2" permanent></v-navigation-drawer>
        <v-main>
          <!--The <slot> element is a slot outlet that indicates
                where the "VIEW" content should be rendered.-->
            <slot></slot>
        </v-main>
    </v-layout>
</template>
Slots are reserved spaces offered by vuejs to display content passed down from one component to another. There are two types of slots in vuejs: named slot and unnamed(default) slot, here's is how it going to work for our case:
Okay, cool, Our layouts have been created successfully. The next step is to specify each view's (page's) layout in the routes.ts file as following:
Home -> will use the default layout
About -> will use the default layout
Profile -> will use the dashboard layout
Attach layouts to your routes
To specify each route's layout, we're going to use the meta property, which accepts an object of properties and can be accessed on the route location and navigation guards, so go ahead and updates your routes.ts file
// path: src/router/routes.ts

import { RouteRecordRaw } from 'vue-router';

const routes: Array<RouteRecordRaw> = [
  {
    path: '/',
    name: 'Home',
    component: () => import(/* webpackChunkName: "home" */ '../views/Home.vue'),
    meta: {
      layout: 'Default',
    },
  },
  {
    path: '/about',
    name: 'About',
    component: () =>
      import(/* webpackChunkName: "about" */ '../views/About.vue'),
    meta: {
      layout: 'Default',
    },
  },

  {
    path: '/profile',
    name: 'Profile',
    component: () =>
      import(/* webpackChunkName: "profile" */ '../views/Profile.vue'),
    meta: {
      layout: 'Dashboard',
    },
  },
];

export default routes;
Auto-registering all created layouts
The penultimate step is to enable the 'Glob' feature provided by vite, which allows us to import multiple files (layouts for our case) based on a file path ( you can register it manually; it's a personal preference )
- Go to your "layouts" folder and create a new file called "register.ts" ( src -> layouts -> register.ts )
// path: src/layouts/register.ts

import { App } from 'vue';
import { ModuleNamespace } from 'vite/types/hot';

/**
 * Register layouts in the app instance
 *
 * @param {App<Element>} app
 */
export function registerLayouts(app: App<Element>) {
  const layouts = import.meta.globEager<string, ModuleNamespace>('./*.vue');

  Object.entries(layouts).forEach(([, layout]) => {
    app.component(layout?.default?.name, layout?.default);
  });
}
- Register layouts by calling the "registerLayouts" function in your main.ts file.
// line 1: import the registerLayouts function

import { registerLayouts } from './layouts/register';

const app = createApp(App);

app.use(router);

// line 2: Register layouts
registerLayouts(app);
Get things DONE
😪 Finally, we can update our App base component to use dynamic layouts. In order to do so we have to:
- Create a layout constructor:
<script lang="ts" >
// path: src/layouts/TheAppLayout.vue

import { computed, defineComponent } from 'vue';
import { useRoute } from 'vue-router';

export default defineComponent({
    name: 'TheAppLayout',
    setup() {
        const route = useRoute();
        /**
         *  This is a computed property that will return the name
         *  of the current route
         */
        const layout = computed(() => {
            const layout = route?.meta?.layout;

            if (layout) {
                return `The${layout}Layout`;
            }
            return 'div';
        });
        return {
            layout,
        };
    },
});
</script>

<template>
    <component :is="layout">
        <router-view />
    </component>
</template>
What is < component > ?
A "meta component" for rendering dynamic components or elements. Check this link for more details.
- Add "TheAppLayout" instance to your entry point component (App.vue)
// Path: src/App.vue

<template>
  <v-app id="app">
    <!-- Add this line: you don't need to import TheAppLayout
       because it is already registered as explained earlier  -->
    <TheAppLayout />
  </v-app>
</template>

<style scoped>
</style>
Here's our final result

Source code
Thank you, I hope you had a good read and found some useful techniques you can use in your daily work. If you like the content, take a few minutes to "Share" this article with your network and give us your feedback.
You can check out the source code on my GitHub: github.com/OMARIZEM/vue-multi-layouts
If you any question, feel free to contact me directly on my LinkedIn: https://www.linkedin.com/in/izemomar/